
⬤ AUD/USD has shown a strong upward reaction after testing a highlighted support area on the hourly Elliott Wave chart. Price entered the blue box region before reversing higher and stabilizing above it. The rebound moved long positions into risk-free territory following the successful support reaction.
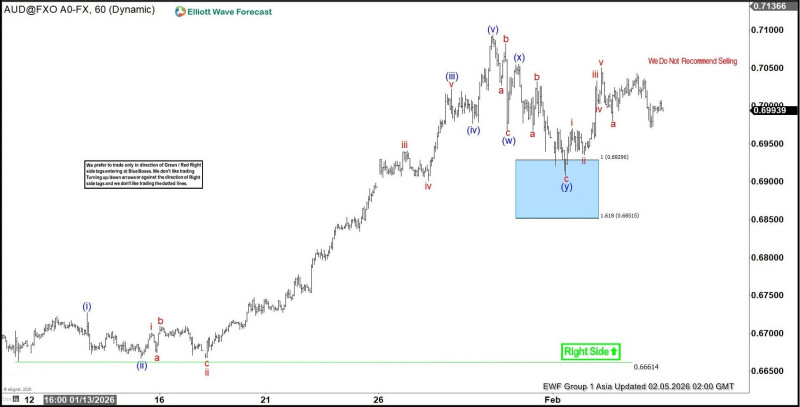
⬤ The blue box represents a corrective completion zone within the broader bullish wave structure. After dipping into the area around 0.6850 to 0.6920, price rebounded and began forming higher swings. The recovery followed a multi-wave pullback with renewed buying pressure. Price later held above the reaction zone and traded near 0.6990, showing buyers regained short-term control.
⬤ The Elliott Wave labeling identifies the correction as complete, with the right side marked bullish and a note indicating selling is not recommended in the current structure. The upward movement from the blue box confirms the support area remained valid, and price action continued forming higher lows after the rebound. The subsequent consolidation occurred above the reaction zone, supporting continuation rather than breakdown.
⬤ This setup matters because AUD/USD often reflects broader shifts in risk sentiment and currency flows. A confirmed reaction from a technical support zone can influence short-term direction and volatility across currency markets. With price maintaining structure above the reaction area, attention remains on continuation behavior as the market reacts to upcoming macro developments.